Image 최적화
✒️ 2025-05-28 11:06 내용 수정
- 이미지는 웹 사이트의 페이지 무게(page weight: 웹 페이지의 바이트 크기)에 큰 비율을 차지하고, LCP 퍼포먼스에 영향을 주기 때문에 이미지 최적화를 하는 것은 중요하다.
- page weight 참고 자료 : Web Almanac Page weight
- LCP image optimization 참고 자료 : Web Almanac LCP image optimization
- Next에서 제공하는 이미지 최적화 기능
- 크기 최적화 : WebP와 AVIF 형식을 사용하여 자동으로 이미지의 크기를 조정한다.
- 시각 안정성 : 이미지가 로딩될 때 자동으로 layout shift되는 것을 막는다.
- 빠른 페이지 로드 : native browser lazy loading을 사용하여 이미지가 viewport에 진입했을 때만 로드된다.
- asset 유연성 : 원격 서버에 저장된 이미지도 크기를 변경할 수 있다.
Image Component
- Next에서 제공하는 이미지 최적화를 위한 Component로, HTML의
<img>태그를 확장한 것이다.- 참고 자료 : Next How to optimize images
- local 이미지 : local에 저장된 이미지를 사용하려면 이미지를 public/ 폴더에 저장해야 하며, jpg, png, webp 확장자 파일을 사용할 수 있다.
- src는 public 폴더 내에서의 파일 경로를 작성한다.
- 이미지의 크기는 원본 이미지 파일의 크기를 사용하여 자동으로 적용된다.
import Image from "next/image"

export default function Test() {
	<Image src="/images/test.png" alt="이미지"
		// width={100} // local은 자동으로 원본 이미지의 너비로 지정함
		// height={100} // local은 자동으로 원본 이미지의 높이로 지정함
	/>
}
- 원격 서버 이미지 : 원격 서버에 있는 이미지를 사용하려면 src는 URL string이어야 한다.
- Next.js는 빌드 프로세스 중에 원격 파일에 접속할 수 없기 때문에
width,height등의 옵션을 반드시 설정해야 한다.
- Next.js는 빌드 프로세스 중에 원격 파일에 접속할 수 없기 때문에
import Image from "next/image"

export default function Test() {
	<Image src="https://test.com/public/test.png" alt="이미지"
		width={100} // 원격 서버 이미지는 반드시 크기를 지정해야 함
		height={100}
	/>
}
- 원격 서버의 경우 이미지를 안정적으로 가져오기 위해
next.config.js파일에 미리 image property에 remotePatterns를 설정하여 hostname을 지정해야 한다.
/** @type {import('next').NextConfig} */
const nextConfig = {
  reactStrictMode: true,
  images: {
    remotePatterns: [
      {
        protocol: 'https',
        hostname: 's3.amazonaws.com',
        port: '',
        pathname: '/test/**'
      }
    ]
  }
};

export default nextConfig;
- 부모 요소에 Image Component를 넣을 경우 부모 요소에
position:relative를 필수로 지정하고, 부모 요소에 크기를 지정 후<Image>에는fillattribute를 적용해서 크기를 지정할 수 있다.
import Image from "next/image"

export default function Test() {
    return(
	    {/* 부모 요소인 .box에 스타일을 지정해준다. */}
		<div className="box">
			<Image src="/images/product-08.png" // public/images/product-08.png
				fill // 부모 요소에 맞게 채움
				alt="상품이미지"
			/>
		</div>
}
Image Component 예제
- public/ 폴더에 images 폴더를 만들고, 폴더에 codeit의 상품 이미지를 저장했다.
import Image from "next/image"

export default function Test() {
    return(
        <>
            {/* 원본 사이즈, 원본 확장자대로 출력됨 */}
            <img src="/images/product-08.png" // public/images/product-08.png
                width={120}
                height={120}
                alt="상품이미지"
            />
            {/* width, height를 필수로 지정, 또는 fill을 사용  */}
            <Image src="/images/product-08.png" // public/images/product-08.png
                width={120}
                height={120}
                alt="상품이미지"
            />
        </>
    )
}
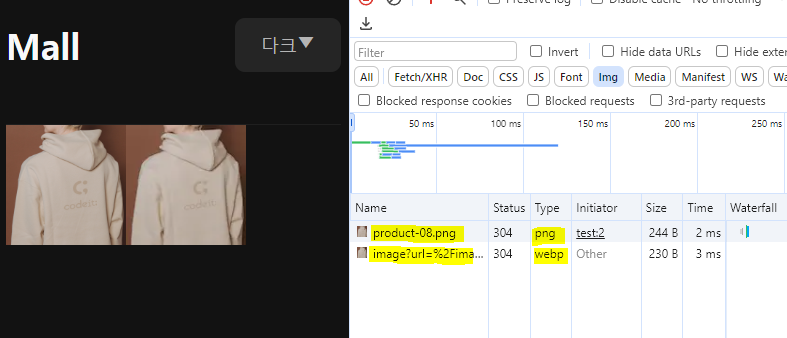
- 페이지에서 F12로 개발자 도구를 연 다음 Network 항목에 들어가서
Ctrl + R로 Network 내역을 확인하면<img>태그를 사용한 경우는 Type이 원본 확장자로,<Image>Component를 사용한 경우엔 Type이 webp로 되어 있다.
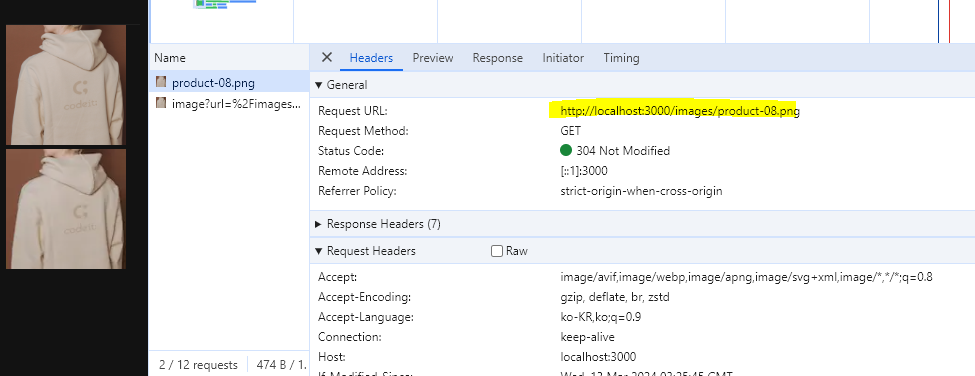
- Header에서 Request URL을 비교했을 때도
<Image>Component를 사용한 경우엔 너비와 높이까지 지정된 URL로 되어 있으며, payload가 존재한다.- payload에 query string parameter로 url, width, height 정보가 포함되어 있다.